As a child, I’d spend hours in my backyard poking around in the dirt. I’d pretend specific plants were magical and “mix” up concoctions. I could be alone with my imagination, whether under the giant pine tree or next to my mom’s garden bed.
But our yard doesn’t offer the same experience for our kids. It’s on a corner heavy with foot traffic and no clear place for them to play in the dirt. So I wanted to make them one – somewhere that was set-aside, just for them. After more than a year of planning – raising a new baby took a higher priority – we finally started building it this spring.
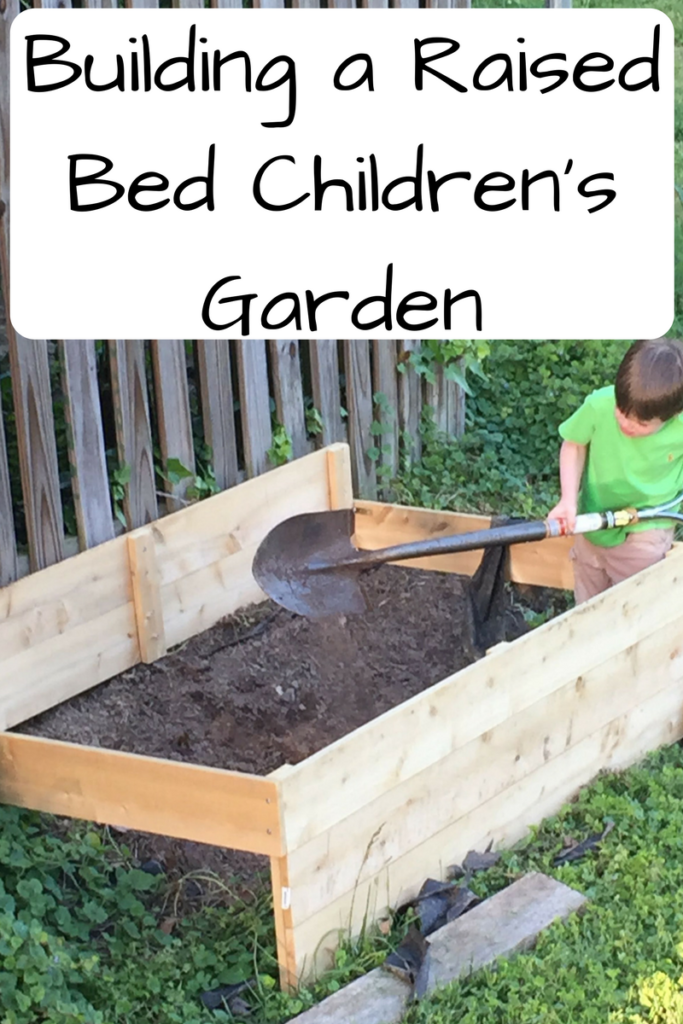
The children’s garden isn’t anything complicated. While there are some amazing outdoor play spaces on Pinterest, we had neither the space or need for anything that elaborate. We just wanted to build something that could hold some dirt. It’s really just a box. Or in fancy garden terms, a raised bed children’s garden.
Unfortunately, the logistics of our yard forced us to employ some engineering skills. Nearly everywhere except our direct front yard and the location of the existing vegetable garden is sloped. To have the box actually lie flat, we had to revise the usual directions on building a raised bed to accommodate our odd location.
Because I’m not the most crafty person ever, I recruited Chris to build the whole thing. (Thanks, honey!)
Here’s what we did:
1. Picked a size for our raised bed children’s garden.
To give both kids enough room to play, we chose a 3X5 box. Obviously, this would differ based on your needs.
2. Evaluated the location.
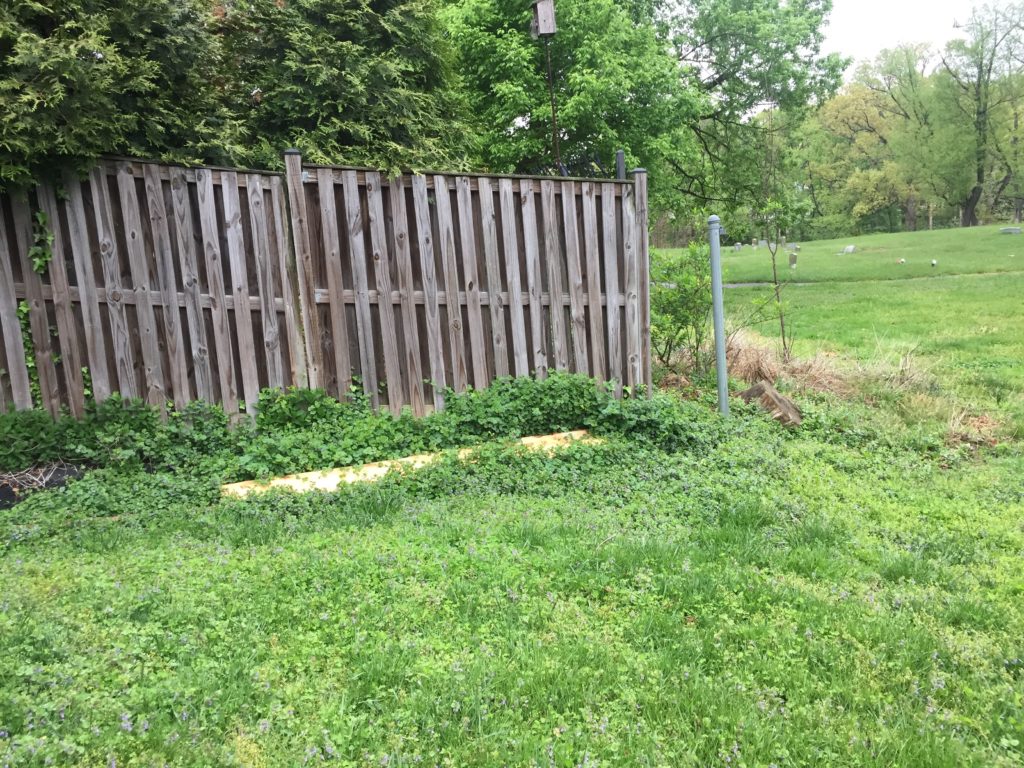
We decided that rather than dig up some spot in the middle of the yard, we’d put it against the fence. The fence would provide stability, a place for future plants to climb, and a little bit of privacy. Because the ground slopes down from the fence, the two sides of the box were inherently going to be different heights. To figure out the box’s width, Chris measured horizontally from where we wanted the box to start against the fence to the other side. For the height on the non-fence side, he measured down from his first measurement to the ground.
3. Bought and cut the wood.
Chris bought 1X6 planks for the box’s sides. At eight feet long, they were easy to cut into a 3X5 box. We specifically chose cedar, even though they’re pretty expensive. For a children’s garden, we didn’t want pressure-treated wood. While most pressure-treated wood no longer contains a form of arsenic (like it did pre-2003), it still uses nasty fungicides and pesticides. In contrast, cedar also takes a very long time to decompose, but is totally safe. It also smells nice.
4. Built the box for the raised bed children’s garden.
Chris first nailed the main planks into a square. (Note: The width of 1X6 planks are actually 11 1/4 inches, something to keep in mind when buying nails. Chris had to go back and get new nails when he realized the ones he bought would stick out on the other side.) In addition to nailing, he also glued the wood in place for good measure. He then added extra wood pieces in the middle of each side to increase strength, as well as metal brackets in the corners for stability. Because the hill meant that one side of the box was significantly higher than the other, he cut side slats based on the slope of the hill. He then nailed the diagonal pieces to the front and back to match the ground line.
5. Stapled chicken wire and black garden ground cover to the bottom of the box.
We have incredibly aggressive weeds in that area, so we hope this will keep them out as much as possible.
6. Prepared the site.
To prepare the site, we dug out the top layer of soil, as well as a two inch ditch around the site for the box it. Recruiting Sprout, he dove right into pulling weeds and turning over the dirt. He was so excited about it that he kept stealing my giant shovel whenever I turned around.
This part also provided the opportunity to talk about our human impacts on the environment. Before we started digging, a lot of the space was covered with a black plastic ground cloth. When we lifted up the cloth, there were hundreds – maybe thousands – of scurrying ants. (Yes, we’ve had a lot of problems with ants this year.) Clearly, they called this spot their own. I explained to Sprout that while we were still going to build our box, we’d give them the chance to move out before digging up the spot. I also briefly lamented that people often don’t consider impacts on animals when they construct houses and buildings.
7. Placed the box.
This was literally just me picking it up and moving it into place. Preferably without Little Bird standing in the spot. I kept having to move him.
8. Filled the box.
Chris filled the bottom of the box with a couple of inches of gravel, both to reduce the amount of dirt we had to buy and provide another barrier against the weeds. After the gravel, he dumped in enough dirt to almost fill the box. (If you totally fill it, there’s not enough space for the kids to play.) He bought regular garden dirt, but in hindsight I might have brought a filler that’s a little less fine-grained. He also surrounded the box with mulch so the weeds don’t start intruding from the sides.
9. Let them loose!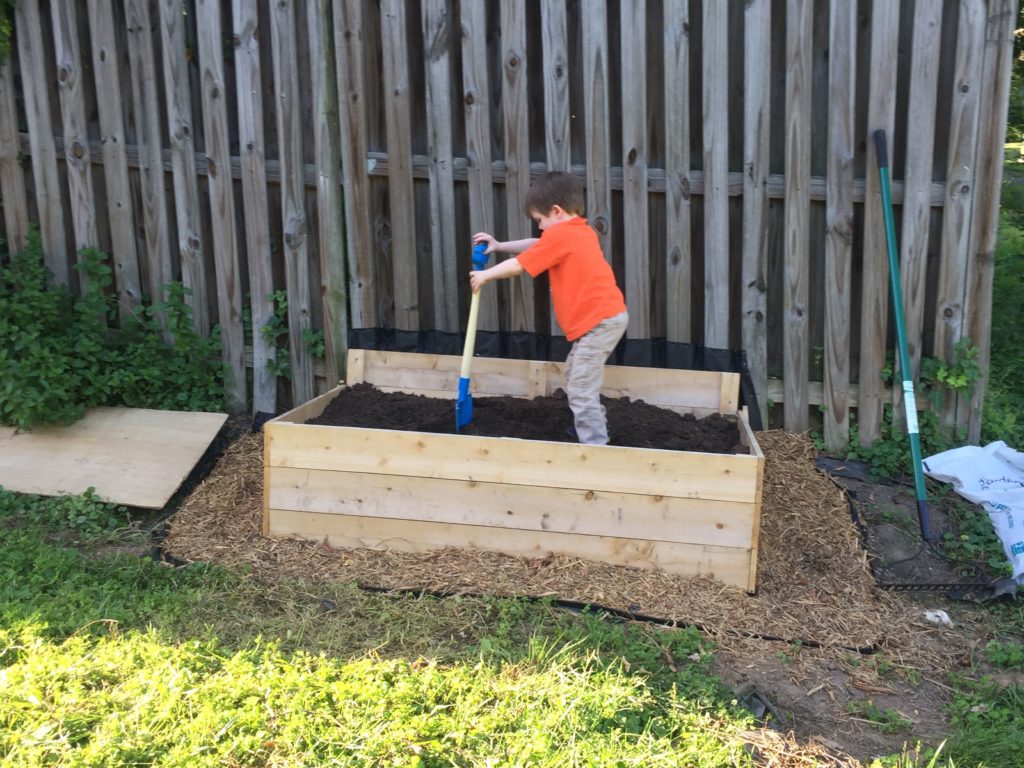
Not long after we finished it, I knew building a raised bed children’s garden was exactly the right thing to do. Sprout declared, “I’m going to dig a big hole!” and went to work.
A few days later, I let Little Bird go to town. As throwing dirt up in the air is pretty much his favorite activity ever, he was sticking his hands in as soon as he sat down. By the time he was done, his whole face was absolutely speckled in dirt. The only reason I pulled him out was because he was getting dirt in his eyes.
In the future, we’ll probably plant some flowers and vegetables. But for now, just playing in the dirt is perfect.
Thankfully, children are always washable – even if it sometimes takes serious scrubbing.
To read more about how I try to involve my kids in gardening, check out The Truth About Gardening with Kids and Green Kids: Building a Lasagna Garden. For updates, be sure to follow us on Facebook!
Pingback: 28 Gardening Resources for Beginners - Pursue Simple Joy
Pingback: Discovering Spring in the Wintertime of Parenting - We'll Eat You Up - We Love You So